CLEARANCE! CHRISTMAS - TEXTILE
- WRAPS
- Wraps in clearance!
- Smooth wraps
- Rayon wraps
- Cotton wraps
- Muslin wraps
- WRAP SETS
- Smooth wraps and fabrics packs
- Mohair wrap + hat sets
- FABRICS FOR BEAN BAG
- Fabrics packs in sale!
- Smooth fabrics
- Special fabrics
- Polar fabrics
- Flower fabrics
- WOOL
- Wool
- Carded wool accessories
- FLOKATIS
- Flokatis 160 cm x 120 cm
- Flokatis 70 cm x 50 cm
- Flokatis 50 cm x 40 cm
- Flokatis packs in offer!
- BLANKETS - SPECIAL FABRICS
- Extra long straight-hair blankets
- Extra long curly-hair blankets
- Long-hair blankets
- Miscellaneous fabrics
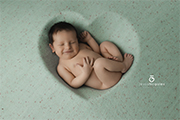
- CLOTHES
- STANDS
- BACKDROP STANDS - TABLE
- Stands on sale!
- POSITIONING TABLE AFI MAX
- SQUARE AND CIRCULAR BACKDROP STANDS
- BEAN BAGS
- POSITIONING PILLOWS - POSING AIDS
- STARTER PACKS
- Circular backdrop stand
- Square backdrop stand
- Travel circular backdrop stand
- Positioning table AFI MAX
- ACCESSORIES
- POSITIONING BOWLS
- FABRICS FOR BEAN PUFF
- Fabrics packs in sale!
- Smooth fabrics
- Special fabrics
- Polar fabrics
- Flower fabrics
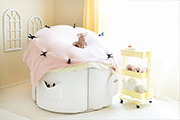
- BACKDROPS
- ACCESSORIES
- SMASH CAKE
- NEW ARRIVALS
- PACKS
- DAMAGED


- Categories
- FLOKATIS
- Express backgrounds
- Backgrounds
- Bean Bags - Posing aids
- Wraps
- Blankets - Fabrics
- Fabrics for bean bag
- Pillows - Covers
- Rustic bowls
- Communions
- Maternity
- NEWBORN Armchairs
- Clothes for newborns
- Wool
- Headbands - Crowns
- Dolls for lens
- Clothes for babies
- Hats for newborns
- Beds - Stands NEW
- Buckets
- Rustic buckets NEW
- Boxes - Drawers NEW
- Baskets
- Decorative pennants
- Decorative cages
- Accessories
- Cars - Aeroplanes
- Maritime items
- Flowers
- Lanterns
- Clearance sales - Faults
- On sale


